Author: Brian

  • Rethinking Your Bathroom Lighting Design

    Rethinking Your Bathroom Lighting Design

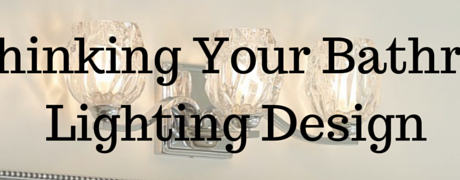
    Do you enter your bathroom each morning wishing there was more of a pop to your overall lighting design?  You’re certainly not alone; many homeowners are left uninspired by their bathroom’s look!

    Since the bathroom is likely the spot you use to get ready for your day, the room is an essential part of your morning routine. Bathroom lighting can make or break your mood, helping to kick-start your morning or relax you at night as you wind down.

    52-Ethan-WB1560AFBS
    PHOTO CREDIT: SPACE DESIGNED BY SPACE HARMONY INTERIORS INC. WWW.SPACEHARMONY.CA, COLIN PERRY PHOTOGRAPHY


    Where to Start

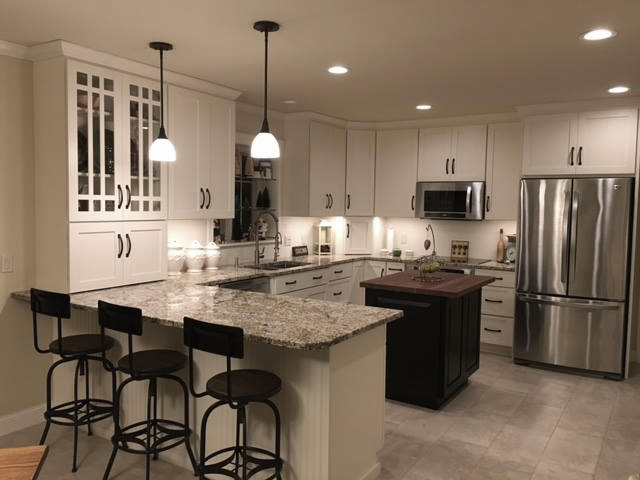
    With bathroom lighting, you need to first think about the types of lighting fixtures you want to use. Many home designs use recessed LED light fixtures to create directional lighting. This will illuminate your bathroom space efficiently, but with light dimmers, you can control the mood with just a touch of your light switch.

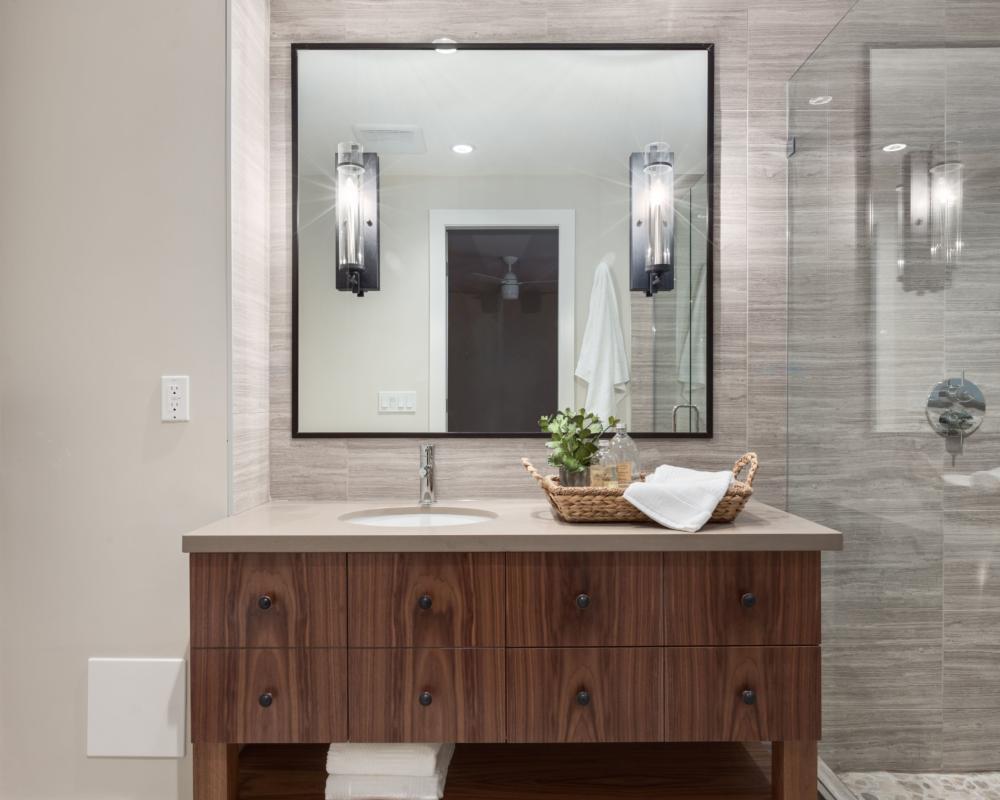
    Additionally, think about your sink and bathroom mirror. This is the area where you do most of your work to get ready in the morning. You need bright and vibrant lighting to ensure you don’t leave home with smeared lipstick or toothpaste in the corner of your mouth.

    Move Away from the Traditional

    If you’re uninspired by your bathroom lighting design, try something completely fresh and new. Instead of standard exposed light bulbs above your bathroom mirror, try adding wall sconces to each side of the mirror. Harsh lights at the top of a mirror can cast shadows that make tasks like shaving or applying makeup more difficult.

    Know Your Colors
    Bathrooms should be calm and relaxing, but not dark enough to put you back to sleep while you’re trying to get ready for the day. Try mixing bright, light paint colors on the wall with darker accents, such as dark wood cabinets or mirror frames. The two contrasting colors will complement one another and lend a unique design to your bathroom.

    If you want more color, implement decorative pieces in the bathroom, such as a framed pictures, brightly colored towels or a shelf holding colorful bathroom knickknacks above the toilet.

    It’s always best to let the accessories shine with bright colors, because you can easily change these items out. However, when investing in new paint or cabinet materials, pick something you know will stand the test of time.

    We offer an extensive collection of bath lighting and would love to answer any questions you might have.  Stop in to the showroom to say hello!

  • 8 Steps to Install a Pendant Lighting Fixture

    8 Steps to Install a Pendant Lighting Fixture

    If you’ve decided to add some elegance to your home lighting design with pendant light fixtures, you might be wondering how to install them. Luckily, pendant lights are not extremely difficult to install, and most avid do-it-yourself people can get it done within an hour or two.

    CLDKitchen

    Here are eight easy steps to install a pendant light fixture:

    1. Cut the Power
    Remember, if you’re not comfortable working with your home’s electrical wires, you should contact a professional for help. However, for those who are up for the challenge, the first thing you need to do is turn off the power through your fuse box to the room you’ll be working in. Always make sure to test the power outlets for a current before you start doing anything.

    2. Take Out Your Old Fixture
    More than likely, you have a ceiling light already in place, and this makes it easy to simply remove the light fixture and base or trim. Once you have an empty hole in the ceiling, you’re ready to put in your new fixture. If you don’t have a ceiling fixture, you will likely want to speak with a professional before cutting into your ceiling.

    3. Check for the Support Beam
    In the hole, you want to make sure there’s a support beam that can hold the pendant light fixture. If not, you’re putting too much weight on your ceiling, which could collapse. If you do not have a beam, you will have to forego the installation process on your own because it could be a building code violation.

    4. Connect the Wires
    Inside the hole where the old light fixture once was should be the wires that were previously connected to the other fixture. You can follow the guidelines on the light fixture’s installation instructions, which usually means connecting black wires to black wires and white to white. You may need to cut and strip the wires to give optimal connection space. Make sure wire connectors hold the two leads together. Your fixture should come with these connectors, but if not, they are available at any hardware store.

    5. Find the Ground Wire
    Before you finish the wiring, it’s critical to find the ground wire, which is usually green or copper colored. Attach the ground wire to the ground screw on the junction box, and tighten the screw to hold it in place.

    Ensure all wires are connected or secured through wire nuts before pushing the wires back into the ceiling.

    6. Add Your Mounting Bracket
    To ensure your pendant will not fall, add the mounting bracket to the support beam. This can be attached with screws, and it’s important to follow the manufacturer’s instructions to set up the light correctly.

    7. Finish Installing the Canopy or Base
    Once you have the support bracket and the wires connected, you want to finish by installing the canopy or base. This piece likely requires screws to hold it in place. Try to set it up like the previous base you removed earlier in this process.

    8. Add a Bulb and Test Your Light
    Once the pendant is able to hang freely, you want to install a light bulb and test the fixture to make sure it works by flipping the fuse box switch back on. If the light does not come on, you need to turn the power off again, and check your wiring, as that is usually the most common problem.

    We have a wide variety of pendant lights available in our showroom!  Stop in and take a look, and remember if you’ve found something that you like online-we’ll match the price!

  • The Three Basic Types of Lighting

    The Three Basic Types of Lighting

    There are three basic types of lighting that work together in your home:

    1. Ambient (general lighting)
    2. Task
    3. Accent

    A good lighting plan combines all three types to light an area according to function and style.

    Progress Lighting Ambient lighting provides an area with overall illumination. Also known as general lighting, it radiates a comfortable level of brightness without glare and allows you to see and walk about safely. In some spaces such as laundry rooms, the ambient lighting also serves as the primary source of task lighting.

    It can be accomplished with chandeliers, ceiling or wall-mounted fixtures, recessed or track lights and with lanterns mounted on the outside of the home. Having a central source of ambient light in all rooms is fundamental to a good lighting plan.

    Philips Lightolier Task lighting helps you perform specific tasks, such as reading, grooming, preparing and cooking food, doing homework, working on hobbies, playing games and balancing your checkbook. It can be provided by recessed and track lighting, pendant lighting and undercabinet lighting, as well as by portable floor and desk lamps.

    Task lighting should be free of distracting glare and shadows and should be bright enough to prevent eye strain.

    Tech Lighting Accent lighting adds drama to a room by creating visual interest. As part of an interior design scheme, it is used to draw the eye to houseplants, paintings, sculptures and other prized possessions. It can also be used to highlight the texture of a brick or stone wall, window treatments or outdoor landscaping.

    To be effective, accent lighting requires as least three times as much light on the focal point as the general lighting surrounding it.

    Accent lighting is usually provided by recessed and track lighting or wall-mounted picture lights.

  • Create the Perfect Workspace In Your Home

    Create the Perfect Workspace In Your Home

    This is the time of year when we make resolutions like “create a budget,” or “get those photos into a book once and for all.” These are organizational tasks that would be easier to stick to if you had an inviting workspace in your home. Here’s how to do it!

    Young business woman calculates tax at desk in office
    Get a jump on the new year with a well lit workspace!

    1. Reduce Outside Communication
    If you need to get work done, you don’t want to go to public spaces such as coffee shops or libraries. If you do this, you run the risk of being distracted. Your work time could be significantly affected if you run into a friend while out. Limit all sources of communication and try your best to disconnect yourself from social media and your phone.

    2. Use Natural Light
    Your basic lighting design is critical to your workspace. If you work in a dark space, you’re likely to get exhausted or give up before you’re done. Allow plenty of natural light to come into your home and workspace.

    3. Implement Artificial Light
    Whether your workspace cannot receive natural light or you need to work at night, you still should use appropriate lighting. For your work area, it’s smart to use a task lighting fixture near your desk or primary workspace. On the other hand, you don’t want the light directly faced in your eyesight. This can strain your eyes and make it difficult to focus. Fixtures such as a swinging arm wall light or a bendable table lamp are perfect solutions that allow you to adjust the light’s direction.

    Additionally, you want to use the correct amount of ambient lighting in the room. You want to stay away from using a single light in a completely dark room. This also strains your eyes and makes it harder for you to read. Instead, make sure your ambient light fixture hangs appropriately to cast enough brightness for the entire room.

    Come see us at our showroom to check out the many options for the above mentioned fixtures.  We have decades of knowledge to share and would love to help you bring light into your workspace.

  • Give the Gift of Light This Christmas

    Give the Gift of Light This Christmas

    Did you leave your shopping for the last minute?  It’s okay, we’ve all done it!  Instead of buying an ill-fitting sweater or a toy that will lose its luster in about a week, consider the gift of light this Christmas!

    We’ve rounded up our favorite lighting gifts for men, women and kids below-all available now at our Mechanic Street location.  We offer free lighting consultations and match online pricing, so local and come see us soon!

    FOR HER: A lovely mirror from Vagabond Vintage will dress up any wall!

    E65335181_F

    FOR HIM:  A contemporary and practical Z-Bar LED desk lamp by Koncept is a stylish addition to his office.

    image

    FOR THE KIDDOS:  The colorful and adjustable Medusa lamp from Lumisource.  Make a bold statement and allow the kids to adjust the gooseneck arms in whichever formation they would like!

    31MfHO2P8JL._SX425_

    We hope you’ve enjoyed our quick little round up of last minute gifts!  Happy Shopping!

  • Using Lighting to Winter-Proof Your Home

    Using Lighting to Winter-Proof Your Home


    On someone else’s house, icicles may be a gorgeous sight. On your own home, however, they may be indicative of much more than just the time for snow angels and Christmas carols.


    Icicles, when confined to the gutters, can be a tell-tale sign of an ice dam, which can result in water damage and leaks throughout your home. Luckily there are measures you can take to prevent such winter inconveniences; some are as simple as adjusting your interior lighting fixtures.

    What is an ice dam ?
    Ice dams occur when the snow on your roof can’t escape because of water that has frozen around the roof’s perimeter. As the heat from your home melts the snow atop your roof, the water seeps in, causing possible damage to your insulation, walls, gutter, etc.

    This is due to the movement of heat throughout the home. Heat travels to the roof surface in three ways: conduction, convection and radiation, all working in tandem to melt the trapped snow.

    While it’s important to know that ice dams in no way indicate a construction error, you can help prevent serious damage to both the roof and interior of your home by being vigilant and making a few home improvements before the temperature drops.

    Using lighting to guard against leaks and ice dams
    Convection is heat traveling through a solid, while conduction and radiation refer to heat traveling through air and electromagnetic waves, respectively.

    When combined with the heat given off by recessed lighting, there can be more heat in the attic area than normal. To prevent ice dams, the roof needs to at least remain an even temperature, if not cooler than the rest of the house.

    Downlights give off a considerable amount of heat via convection if not airtight, and are often not insulated properly. The easiest way to remedy this is to either replace the current fixture with an IC-rated light, or to reconfigure parts of the insulation.

    When a recessed fixture is powered on, its heat makes the exterior cavity hot. IC-rated lights protect against any combustion that may occur when the house meets the insulation. If all of the insulation in your attic or roof area is flat, it’s likely that you do not have enough to cover your downlights; insulation should be thicker around a downlight to contain heat. It is a safety hazard to place non-IC-rated lights against insulation – if working with one, be sure that your fixture is the recommend distance away from any insulation.

    Taking either of these precautions will minimize the amount of hot air flowing to your roof.  If neither of these are an option you can switch to LED or CFL light bulbs, as they emit less heat.

    Though better insulation should eliminate much of the heat buildup, using a roof-rake or ice melt can also help to do away with ice dams.

    To select the best winter lighting for your home, stop in and visit our showroom!

  • Shop Small: 10% off Lamps for Small Business Saturday

    Shop Small: 10% off Lamps for Small Business Saturday

    Creative Lighting Designs feels that holidays should be spent with loved ones, so we are closed Thursday for Thanksgiving and also on Friday of this week.  We will open our doors for Small Business Saturday on the 28th, and we hope to see you here!  (Leave a comment if you think Lois should bake something special for our customers!)

    Stop in on Saturday and enjoy 10% off all stock table and floor lamps.  Not sure exactly what you need in your space?  We’ll walk you through the options and help you decide what’s best!

    Our showroom is filled to the brim with the latest in lighting and home decor.  We’ve recently reworked our displays to feature a new crystal gallery, plenty of LED lighting and more!

    We hope to see you on Saturday! #Shopsmall

    ~Brian and Lois Horan

  • Telescope Patio Furniture

    Telescope Patio Furniture

    We are excited to be carrying Telescope Patio Furniture.

    (more…)